GitLab tutorial
Create a new project in Gitlab
We recommend that the project is created from the biogitflow template or you can follow the procedure below.
Add the new projet
Select Projects in the upper left menu

Click on

Link your project to a group (if needed)
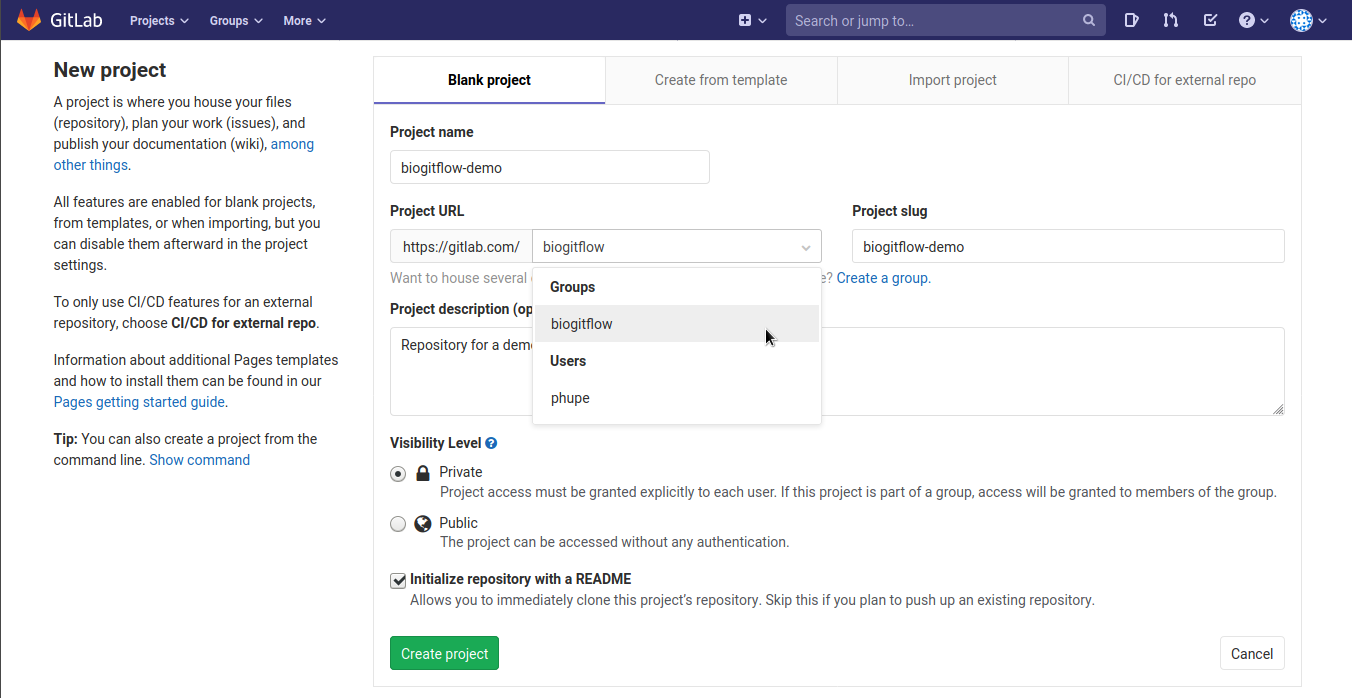
Give a name and a description to your new project
Check that the Visibility Level is set to Private
Select the option Initialize repository with a README
Add the templates for the issues and merge requests
Clone the new project:
git clone git@gitlab.com:biogitflow/biogitflow-demo.git
cd biogitflow-demo
Create the hidden folder
.gitlab:
mkdir .gitlab
Copy the content of the directory biogitflow templates such that the
.gitlabfolder contains the following folders:
issue_templates
merge_request_templates
Push the templates on the main branch on the remote repository:
git add .gitlab
git commit -m "[ADD] templates for issues and merge requests"
git push origin main
Create the branches
Click in the Repository menu in the left panel, in order to create the release, hotfix and devel branches from the main branch
Click on the New branch button:

in the form, fill Branch name = devel and Create from = main

Iterate the same procedure twice to create:
the release branch
the hotfix branch
Set the default branch
Click in the Settings menu in the left panel, select the Repository sub-menu, then click on the Default Branch button to expand the section:
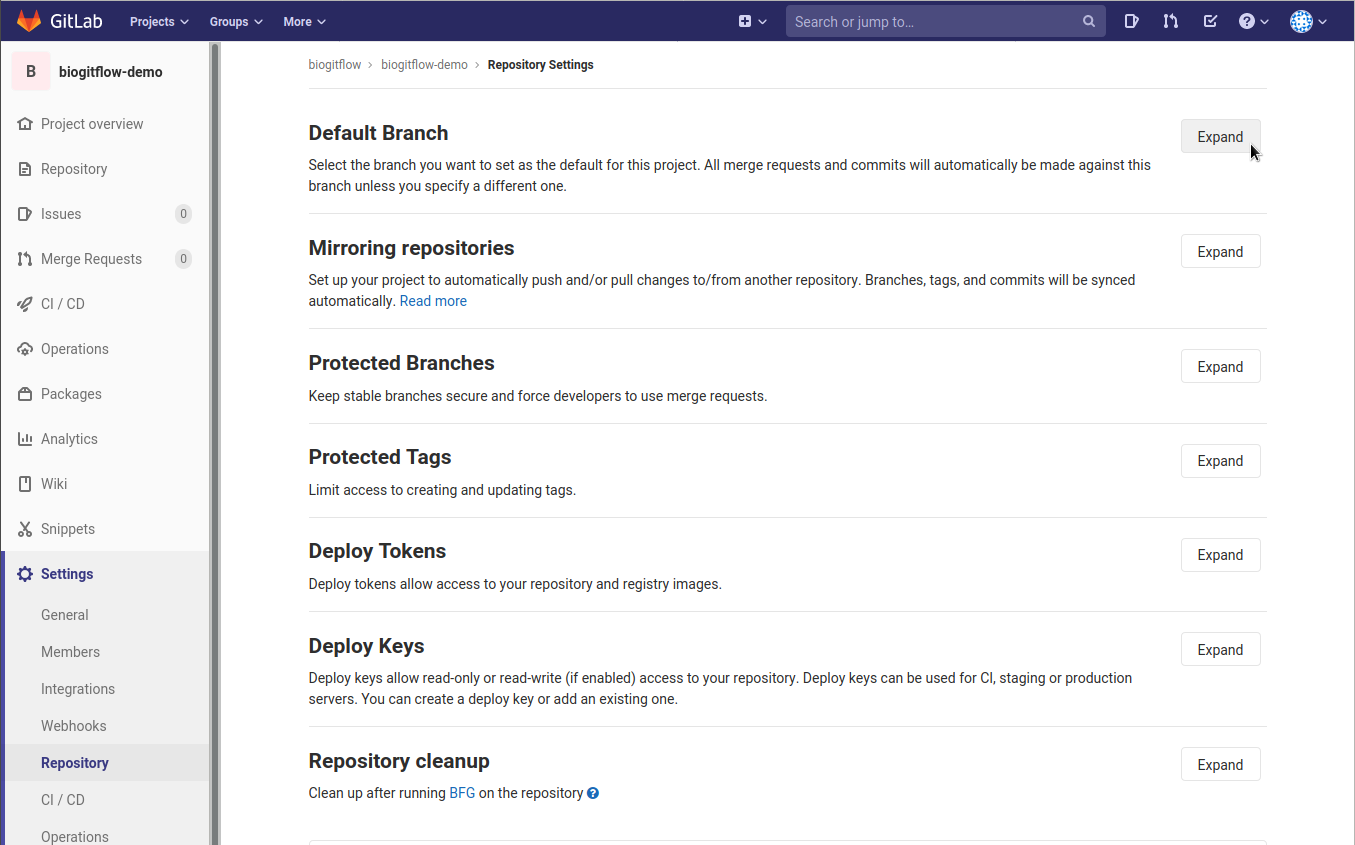
Select Default branch = devel in the scrolling menu and click on the Save changes button:

Set the protected branches
Click in the Settings menu in the left panel, select the Repository sub-menu, then click on the Protected Branches button to expand the section:

Protect the release branch such that only the users with the Maintainers role can push and merge:
In the form select Branch = release, Allowed to merge = Maintainers and Allowed to push = Maintainers, then click on the Protect button:

Check that main, hotfix and release branches are protected

Set the protected tags
The use of the tags is reserved to the user with the Maintainer role.
Click in the Settings menu in the left panel, select the Repository sub-menu, then click on the Protected Tags button to expand the section:

In the fields Tag, add * and then click on Create wildcard *

Check that the field Allowed to create is set to Maintainers and then click on the Protect button:

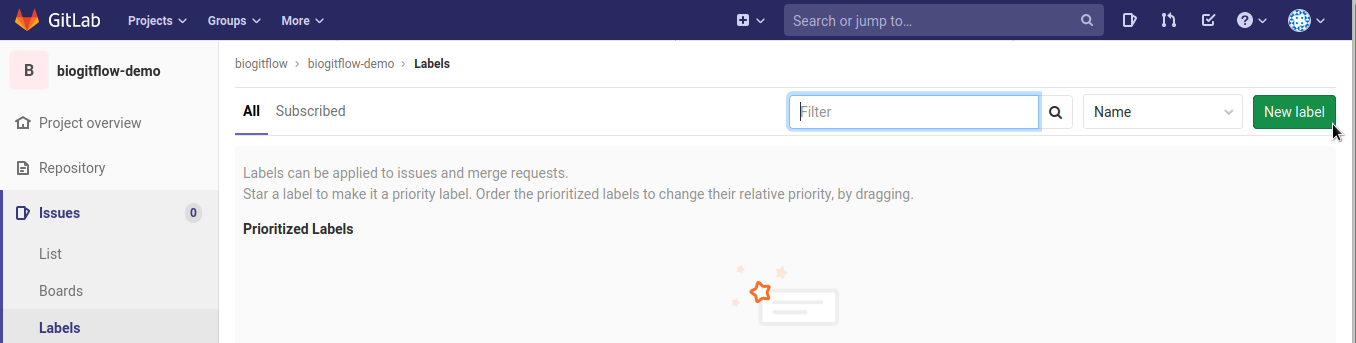
Add a set of labels for the issues
Click in the Issues menu in the left panel, select the Labels sub-menu
It is possible that some labels already exist if the project has been created inside a group for which some labels have been already set (using the Promote to Group Label functionality for example)
If there is no label, then click on Generate a default set of labels:

Create the labels need by biogitflow documentation that are not in the default set:
Create the new labels
 for the Validation of a new release by the end-users:

Create the new label
 for the Deployment in the production environment:
Check that all the labels required by biogitflow documentation are available:


Add members to the project
Click in the Settings menu in the left panel, select the Members sub-menu
by default, all the members of the group have access to the new project
if needed, add additional members with their specific role

Configure GitLab-CI
If you use GitLab-CI to deploy the pipeline, some configuration may be required. In our infrastructure, we have to apply the settings described below.
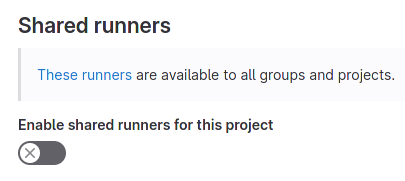
Disable the Shared runners
For each pipeline GitLab repository, the sys admin has to setup a runner (which is implemented using rootless podman container). It is important to check that the Shared runners are disabled. In order to check the runner configuration:
go to Settings > CI/CD
expand the Runners section
The configuration should look like this:
Increase the timeout of gitlab-ci jobs
Some job may take some time:
the job which builds the containers
the job which launches the test on the pipeline
the jobs which submit task on slurm (which may be queued for a while)
Therefore, it is important to change the timeout. In your project:
go to Settings > CI/CD
expand the General pipeline section
set Timeout to 1d
Save changes

Create a Merge Request in Gitlab

Set the source branch

Set the target branch

Add a description using the Merge Request template

Assign the Merge Request to a user with the Maintainer role


Set the option to delete the branch after the merge

Submit the Merge Request
Click on Submit merge request.
Review and merge of the Merge Request by the Maintainer
The Maintainer reviews the Merge Request and click on Merge:
